Saving Vegetable Seeds for Beginners: Easy Crops, Isolation Distances & Storage
Not every seed in your garden is worth saving, and not every seed you save will grow the plant you think it will. The good news: four of the easiest vegetables to grow are also the easiest to save seed from, with no isolation and no special equipment at all.
Why this isn't just "let a few plants go to seed"
Seed saving pays off twice: it cuts next year's seed bill, and over a few seasons it slowly selects for plants that actually thrive in your soil, your weather, and your growing habits — something no seed catalog can promise. But two things trip up almost every first-time seed saver, and both are avoidable once you know they exist: saving seed from a hybrid plant, and letting two varieties of the same crop cross-pollinate without realizing it.
Hybrid vs. open-pollinated: the difference that decides whether this even works
University of Idaho Extension draws the line clearly. Open-pollinated varieties — including heirlooms, which are simply open-pollinated varieties grown and handed down long enough to earn the name — produce seed that grows true to the parent plant, year after year, as long as it wasn't cross-pollinated by a different variety. Hybrid (F1) seed is a deliberate one-time cross between two specific parent plants. Its seed doesn't come back true: plants grown from a hybrid's own seed are often sterile, usually revert toward one parent or the other, and can carry a patent that makes replanting them a legal gray area besides. If a seed packet or plant tag says "hybrid" or "F1," save yourself the disappointment and buy fresh seed next season instead.
The crops to start with — no isolation needed
Both University of Idaho Extension and University of Illinois Extension point to the same short list as the right place for a beginner to start: peas, beans, lettuce, and tomatoes. All four are self-pollinating annuals — the flower pollinates itself before it even opens, in most cases — so a single plant of a single variety needs no isolation distance at all to come back true. Grow one variety of each (or space different varieties a modest distance apart, as a simple precaution) and you can save clean seed the very first year you try.
A step up in difficulty: peppers, spinach, parsley, carrots, beets, and Swiss chard are rated "easy" rather than "extremely easy" by seed-saving guides, because they're insect-pollinated (so a neighbor's different variety can cross with yours) or biennial (carrots and beets don't flower until their second year, so you have to overwinter the root to get seed at all).
Only the same species crosses — so check the Latin name
A detail that saves a lot of confusion: plants in the same family don't necessarily cross with each other, but different varieties of the same species will. Cucumbers (Cucumis sativus) and summer squash (Cucurbita pepo) are both cucurbits and look like close cousins, but they won't cross with each other — they'll only cross with other varieties of their own species (a cucumber with another cucumber, a zucchini with a pumpkin, since both are Cucurbita pepo). When in doubt about whether two varieties in your garden will cross, the species name on the seed packet is the real answer, not the common name.
Isolation distances, where they actually matter
If you're growing more than one variety of a crop that does cross-pollinate, University of Idaho Extension's isolation-distance chart gives real numbers to plan around:
| Crop | Pollination | Isolation distance |
|---|---|---|
| Common bean, lettuce, pea, tomato | Self (or occasional insect) | 10–50 ft |
| Lima bean | Self or insect | 160–500 ft |
| Pepper | Self or insect | 300–1,600 ft |
| Okra | Self or insect | 500–1,600 ft |
| Cucumber, melon, watermelon, pumpkin, squash | Insect | 800 ft–½ mile |
| Broccoli, cabbage, cauliflower, kale, kohlrabi | Insect | 800 ft–½ mile |
| Carrot, onion, cilantro, tomatillo, radish | Insect | 800 ft–½ mile |
| Corn, beet, spinach, asparagus | Wind | 800 ft–1 mile |
If your lot is nowhere near that big (most aren't), the chart isn't a dead end — it's a reason to use one of two other isolation methods instead: stagger your planting dates so the varieties you're keeping separate don't actually flower at the same time, or physically cover the flowers with a floating row cover, paper bag, or fine nylon bag and hand-pollinate with a small brush or cotton swab.
Harvesting and processing: dry seed vs. wet seed
The two extension sources agree on a simple split:
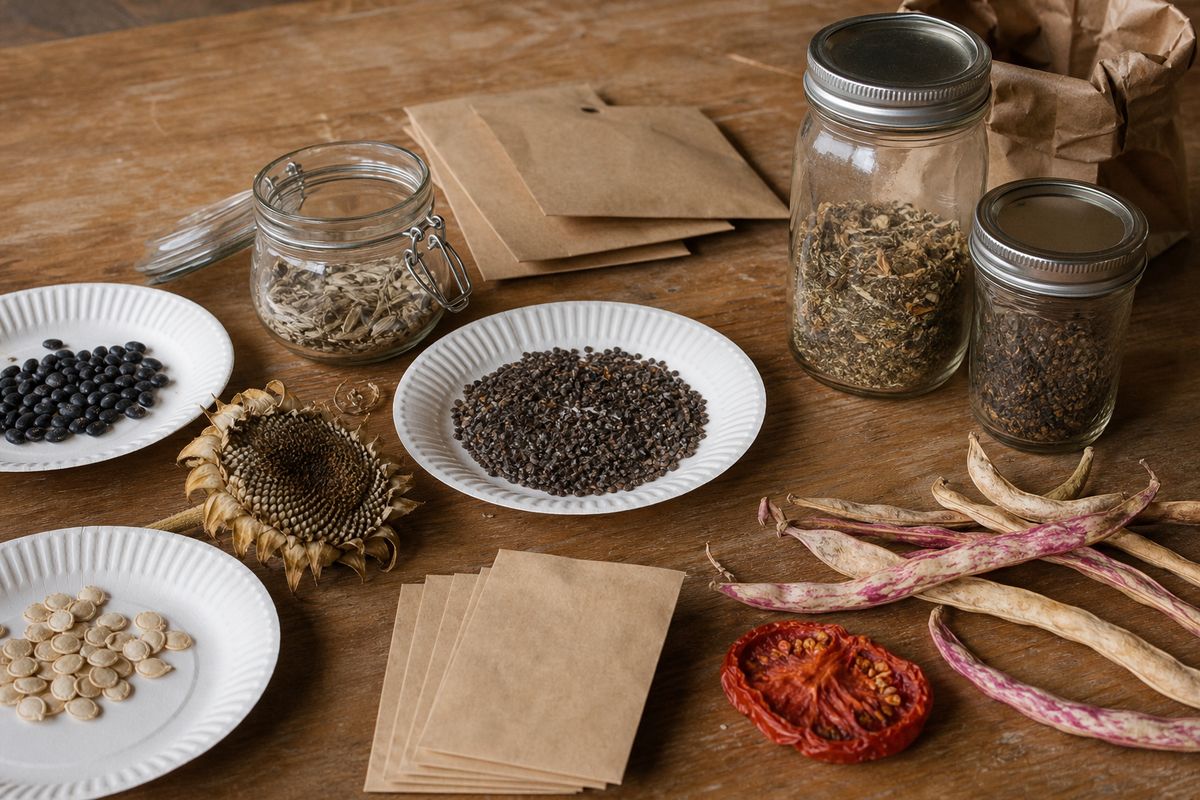
- Dry processing — beans, peas, peppers, onions, carrots, lettuce, and most herbs: let the pod, husk, or seed head dry as far as possible on the plant, cut it before it shatters and drops seed on its own, then finish drying it on a screen or in a paper bag in a cool, well-ventilated spot before threshing or crumbling it free of the chaff.
- Wet processing — tomatoes, eggplant, cucumbers, melons, and squash: let the fruit fully ripen (past the point you'd want to eat it, for tomatoes), scoop out the seeds with their surrounding pulp, and separate them from there.
Storing seed so it's actually viable next spring
Whichever method you used, seed has to be completely dry before it goes into storage — sealing away seed that's even slightly damp is the single most common way to lose a year's saving effort to mold. From there:
- Use a moisture-proof container — a glass jar, a paper envelope inside a sealed jar, or a plastic bag with the air pressed out.
- Store cool, dark, and dry: 32–41°F (0–5°C) with humidity at 50% or below is the target range, which in practice usually means a refrigerator rather than a shelf in a shed or garage that swings with the seasons.
- A silica gel packet or an oxygen absorber in the jar can extend how long seed stays viable.
- Let a refrigerated jar come back to room temperature before opening it — opening it cold invites condensation onto the seed.
- Label every container with the crop, variety, and the year it was saved. This sounds obvious and is the step almost everyone skips, right up until they're holding three unlabeled envelopes of bean seed the following spring.
Testing old or questionable seed before you rely on it
Before you plant a whole row on seed you saved a year or two ago, a simple home germination test tells you what to expect instead of guessing. The standard version, sometimes called a rag-doll test:
The short version
Start with peas, beans, lettuce, and tomatoes — self-pollinating, no isolation needed, and forgiving of a first attempt. Skip saving seed from anything labeled hybrid or F1. Dry-process pod and seed-head crops on a screen; wet-process and ferment tomatoes and their relatives. Store finished seed bone-dry, cold, dark, and labeled. And before you trust seed that's sat in a drawer a year or two, run a quick rag-doll germination test rather than finding out at planting time that only a third of it was still alive.
Keep next year's seed organized, not scattered in envelopes
The Garden Planner Printable has a dedicated seed-starting and harvest log to track what you saved and from which plants, and the Homestead Garden Master Planner goes further with a full Seed Inventory System section built for exactly this — viability notes, source, and year saved, all in one place. For the planting side of the loop, see our guides to tomatoes, peppers, and companion planting.
Browse the shop →