Growing Peppers in a Backyard Garden: A Beginner's Guide to Spacing, Staking & Sunscald
Peppers are patient plants grown by impatient gardeners — most of the ways a pepper crop disappoints (blossom drop, sunscald, a plant that never seems to size up) trace back to the same two things: the soil wasn't warm enough when they went in, or the plant was left to flop over in full sun.
Peppers share a lot of growing logic with their nightshade cousin; see our growing tomatoes guide for the parallel on spacing and blossom end rot, and our companion planting guide for what grows well alongside both.
Starting indoors and timing the transplant
Utah State University Extension's pepper guidance recommends starting seeds roughly 2 weeks before your last frost date, sowing 4–6 seeds about ½ inch deep per cell or pot and thinning to one plant once seedlings have two true leaves. A good transplant looks stocky and dark green, 5 to 8 inches tall with 6 to 9 leaves — and USU specifically advises removing any transplant that's already flowering or fruiting before it goes in the ground, since a stressed, pot-bound plant that's already trying to fruit rarely recovers into a strong producer. Don't rush the move outside: transplant once soil has reached about 60°F and all frost danger has passed. University of California Cooperative Extension guidance is more specific still on temperature: nighttime readings should stay mostly above 55°F, with fruit set happening best between 65°F and 85°F and very little fruit set at all above 90°F, especially on bell types.
Spacing, soil, and warming the ground
Give peppers a sunny site and fertile, well-drained soil — UC Extension puts the ideal pH around 6.5 and notes that peppers do genuinely poorly in heavy, wet soil, to the point that a raised bed is worth building if drainage is a known problem. On spacing, the two Extension sources land in a similar range: USU recommends transplants 18 inches apart in rows 18–24 inches apart, while UC suggests roughly 2 feet between plants — either works, and tighter spacing simply means more plants to manage per square foot. Both sources recommend warming the soil before the organic mulch goes down: black plastic mulch can go down early to raise soil temperature, but hold off on straw, grass clippings, or newspaper mulch until the soil is reliably above 75°F, since organic mulch actually keeps soil cooler underneath it.
Watering and fertilizing without overdoing either
Water deeply and infrequently rather than little and often — about 1 to 2 inches per week, with drip irrigation preferred by both Extension sources specifically because it keeps the soil surface and foliage drier than overhead sprinklers, which cuts down on root rot and leaf disease. On fertilizer, the advice runs the opposite direction from instinct: USU recommends a light side-dressing (about ¼ tablespoon of a high-nitrogen fertilizer like 21-0-0 per plant) at 4 and 8 weeks after transplanting, placed 6 inches from the stem and watered in, while UC's guidance favors a fertilizer blend higher in phosphate and potassium than nitrogen once plants are established, since nitrogen pushes leafy growth at the expense of fruit. Both agree on one point: overfertilizing, especially with nitrogen, delays fruiting rather than speeding it up.
Blossom drop and blossom-end rot are two different problems
It's easy to lump every pepper problem into "something's wrong," but these are genuinely different issues with different fixes:
- Blossom drop is a temperature problem, not a care mistake. USU explains that nights below 55°F or days above 90°F can stop fruit set outright, causing flowers to drop before they ever become peppers; high heat specifically during flowering and early fruit growth has the same effect. The reassuring part: this one typically resolves on its own once the weather moderates, and row covers (if you're using them for frost protection) need ventilating once air temperatures climb past 80°F so they don't make the problem worse.
- Blossom-end rot shows up as a dry, sunken brown-to-black patch on the bottom of the fruit, and USU attributes it to a localized calcium deficiency usually triggered by uneven watering, drought stress, excess nitrogen fertilizer, or root damage — not necessarily a true shortage of calcium in the soil itself. The fix is consistent soil moisture, especially during hot weather and while the plant is flowering and setting fruit, plus a layer of mulch to buffer soil moisture swings between waterings.
Staking: the single change that cuts sunscald sharply
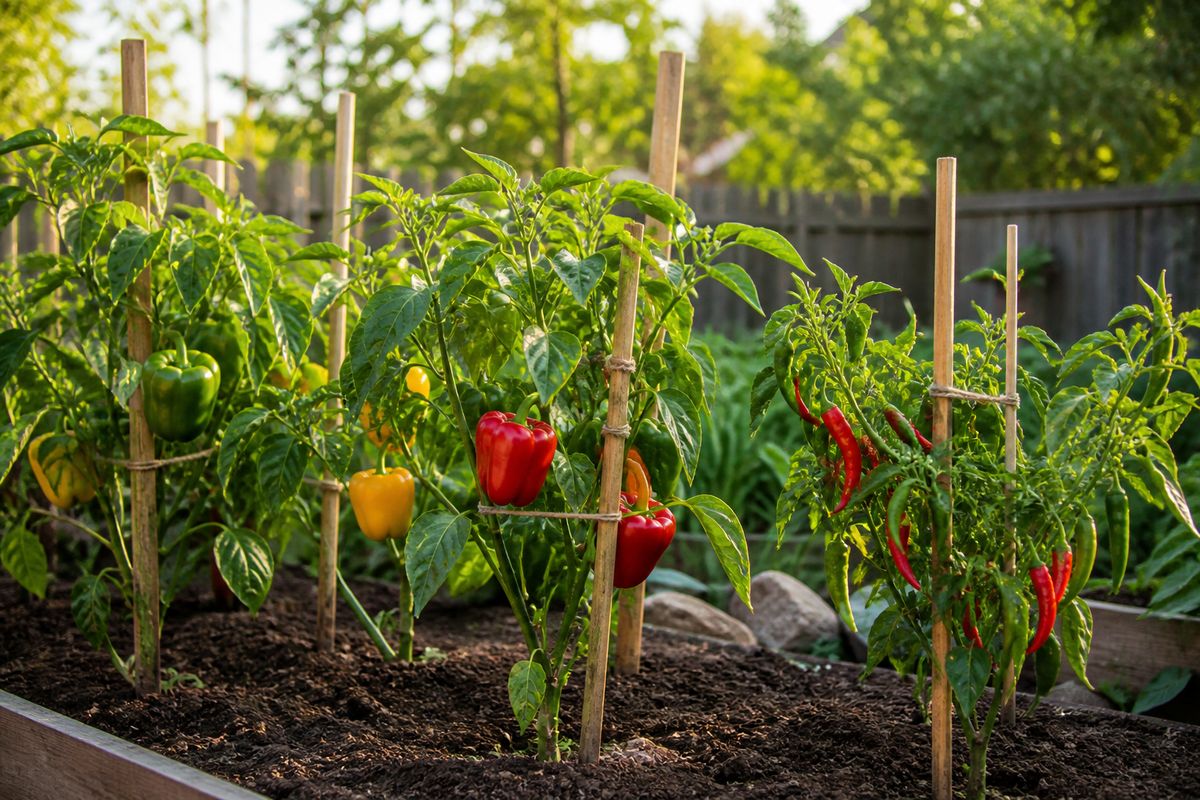
Sunscald is often misdiagnosed as a disease, but a University of Maryland Extension fact sheet traces the real cause to something simpler: wind. Peppers exposed to direct sun during hot weather can scald, and wind frequently blows unstaked plants over to one side, suddenly exposing fruit that had been shaded by foliage moments before — damage can set in after a surprisingly short exposure. Scalded fruit develops papery, bleached or tan patches, often followed by black fungal growth, and in bad cases the affected area turns soft, watery, and smelly. The fix UMD documents is almost absurdly simple: in a side-by-side field comparison, pepper plants staked and tied upright had under 2% sunscald-damaged fruit, compared with 17% in untied plants of the same variety planted the same day. Tying usually only needs doing once per plant, and the stake doesn't need to be taller than the plant itself — a leftover tomato stake works fine.
Pests and diseases to watch for
USU's pest list for peppers is a familiar one for most vegetable gardens: aphids (soft-bodied insects clustering on leaf undersides, controlled with insecticidal soap or a strong water spray), flea beetles (small black beetles that riddle young seedling leaves with holes), and hornworms (large caterpillars best hand-picked or treated with Bt on heavier infestations). On the disease side, watch for leaf blights and spots (avoid late-day overhead watering and let soil dry between waterings), wilt diseases that take a plant down from the bottom up (rotate crops and avoid overwatering), and viral diseases spread by aphids and leafhoppers, which show up as mottled, curled, or stunted growth and have no cure once established — remove infected plants promptly rather than hoping they recover.
Harvest: sweet peppers reward patience, hot peppers reward full color
Sweet peppers can be picked green at any point once they're firm and full-sized, but UC Extension notes that letting them ripen fully to red, yellow, or orange on the plant measurably increases both sweetness and vitamin A and C content — it's a genuine trade-off between an earlier harvest and a better one, not just a color preference. Hot peppers meant for drying should ripen fully on the plant before picking. Either way, cut fruit free with scissors or pruners rather than pulling it, since pepper branches snap easily and pulling can take a chunk of the plant with it. USU notes fruit generally takes 35–45 days from flower to full color depending on variety and weather, and once harvested, peppers hold up best around 50–55°F for a week or two — standard refrigerator temperatures are colder than that and can cause chilling injury over longer storage.
The short version
Give peppers warm soil before they go in the ground, even moisture rather than a feast-or-famine watering schedule, a stake so wind can't flop them into the sun, and patience at harvest if you want the sweetest fruit — the plant does the rest.
A quick-reference guide for the whole season
The Growing Peppers Quick-Grow Guide puts the transplant timing, spacing, and problem-solving above on one printable reference for the potting bench or garden shed. Growing peppers alongside tomatoes? See the Growing Tomatoes Quick-Grow Guide and The Homestead Tomato Garden too.
Browse the shop →