
Growing & Storing Potatoes: A Beginner's Guide to Seed Potatoes, Hilling & Curing for Winter
Potatoes are one of the most forgiving crops a beginner can grow — right up until storage. A potato that grew perfectly can still turn green, sprout early, or rot in the pantry because of one step almost every beginner skips: curing. Here's the real planting-to-pantry process, sourced from university extension potato programs.
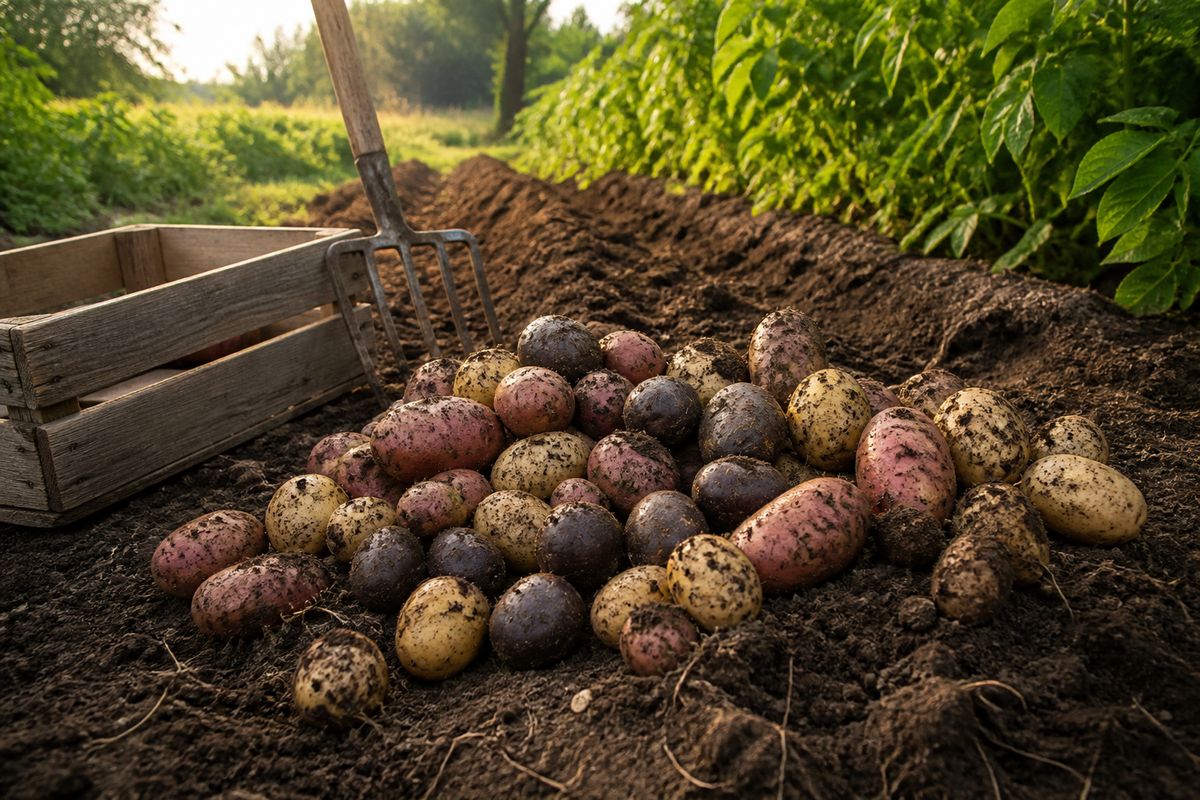
Already thinking about where the harvest will actually live all winter? Our root cellar storage guide covers the storage zones every crop needs, and putting the garden to bed for winter covers the fall cleanup around it. This article is specific to potatoes, start to finish.
Start with the right seed potato
Utah State University (USU) Extension's potato program is specific on this point: plant foundation or certified seed, and discard any tuber or seed piece that shows decay. Grocery-store potatoes aren't a safe substitute — they're not grown or inspected as seed stock, and are often treated with a sprout inhibitor that works against you.
If you're cutting tubers into seed pieces rather than planting them whole, the University of Nebraska–Lincoln (UNL) Extension and USU agree on the shape: blocky pieces, each with at least one eye, weighing roughly 1.5–2 ounces. Cut the pieces about two days before planting (or hold them 2–3 days in a humid, well-ventilated container if planting is delayed) so the cut surface has time to heal slightly before it goes into the soil — that healed surface is what keeps soil-borne disease from getting into the seed piece.
Chitting: pre-sprouting for an earlier harvest
Chitting isn't required, but USU Extension describes a specific, legitimate process for it: about six weeks before planting, spread whole (uncut) tubers in a single layer with their eyes facing up, and keep them around 70°F in bright shade — not direct sun. The warmth pushes strong sprout growth; the bright light keeps the sprouts short and sturdy rather than long and spindly. Aim for sprouts about an inch long by planting day, and don't cut the tubers before chitting them, since cutting causes them to dry out. USU notes the payoff: combined with close spacing (around 6 inches), chitted seed can mean harvest 7–14 days earlier — useful if you're planning to pull some as small "new potatoes."
Planting depth, spacing, and timing
Plant once the danger of frost has passed, ideally into soil that's already 50–60°F — USU warns that cool (below 45°F), wet soil raises the risk of the seed piece simply rotting before it sprouts. Planting depth runs 2–4 inches per USU, or 2–3 inches per UNL; shallower planting speeds up emergence, which itself helps reduce soil-borne disease pressure.
Spacing is a real trade-off, not a fixed number: USU notes that close in-row spacing of 6–8 inches produces more tubers that run smaller, while wider spacing (10–16 inches) produces fewer, bigger potatoes. UNL's rule of thumb for a home garden is 12 inches between plants with about 3 feet between rows.
Hilling — the step that prevents green potatoes
Once plants are about a foot tall, UNL Extension's guidance is to mound 6–8 inches of soil along the entire row. This isn't cosmetic: hilling keeps developing tubers buried and out of direct light, which is exactly what prevents them from turning green near the surface. Keep plants watered evenly through this stage; uneven watering is a separate stress factor on top of whatever hilling does for light exposure.
A disease worth watching for: common scab
University of Connecticut (UConn) Extension's IPM program attributes common scab to a soil bacterium, Streptomyces scabies, that infects tubers mainly while they're actively growing or after insect damage. Dry soil favors the disease, and so does a high calcium-to-potassium ratio or excess nitrogen in the soil. UConn's prevention list: plant only disease-free seed, rotate with soybeans or alfalfa on a 4-year cycle, irrigate to keep soil consistently moist — especially 4 to 9 weeks after tubers set — and avoid the nutrient imbalances above. Soil pH is the single biggest lever: keeping it between 5.0 and 5.3 can meaningfully cut disease severity in susceptible varieties.
Harvest timing
Oregon State University (OSU) Extension recommends cutting back watering in mid-to-late summer and letting the vines die back completely before digging. To check whether tubers are actually mature, dig one up and rub the skin with your thumb — if it rubs off easily, the skins haven't set yet and it's worth waiting another week before digging the rest.
Curing — the step most beginners skip entirely
This is the gap between a garden that grew well and a pantry that lasts. OSU's guidance: cure freshly dug potatoes for 7–10 days in a dark, well-ventilated space at moderate temperature and high humidity before putting them into long-term storage. Minimize light exposure during digging and cleaning itself, not just during the cure. Brush (don't wash) soil off potatoes grown in coarse or sandy ground; rinse ones grown in clay, but make sure every tuber is completely dry before it goes into storage.
Long-term storage: the numbers that matter
After curing, OSU recommends gradually lowering the temperature to 40–46°F for potatoes you'll actually be eating from. Keep humidity high — a potato is roughly 80% water, and dry air shrivels it. Perforated plastic bags or any well-ventilated container work; a cool basement, insulated garage, or a refrigerator set to that same 40–46°F range are all suitable spots.
Two temperature mistakes to avoid in opposite directions: below 38°F, starches convert to sugar, giving you sweeter, darker, oilier results if you fry them — not what most cooks want from a plain potato. Above 46°F, storage life drops sharply to just 2–3 months, with real risk of sprouting and shriveling. Done right, OSU notes mature, late-season, thick-skinned varieties (like russets) can hold 7–8 months in good condition; thinner-skinned red varieties and early-maturing types store for noticeably less time.
Before settling potatoes into long-term storage, sort out anything cut, bruised, or showing disease — OSU is specific that these don't store well and can spread decay to the rest of the bin, so use them within the first month instead of mixing them in. And keep the storage area dark throughout: light-exposed potatoes turn green from harmless chlorophyll, but that green color often signals solanine, a genuinely toxic compound, right alongside it. Discard any potato with significant greening rather than just cutting the green part away.
One more thing OSU flags specifically: don't replant tubers that sprouted or shriveled in storage the following spring. They can carry disease, including viruses, into next year's crop. Start each new season with fresh certified seed potatoes instead.
The short version
Certified seed, cut and healed (or chitted) before planting, 2–4 inches deep with hilling once plants are a foot tall, harvested only after the vines die back, cured 7–10 days in the dark, then stored at 40–46°F with high humidity and away from light. Skip the curing step and everything upstream of it can still go to waste in the bin.
Printable tools for the harvest-to-pantry stretch
The DIY Buried Barrel Root Cellar Guide builds the actual storage space potatoes need once they're cured, and the Root Cellar Storage Chart puts the temperature and humidity numbers for potatoes and every other crop on your wall. Working out planting dates and bed rotation for next year's potato patch? The Homestead Garden Master Planner covers frost dates, bed layout, and a full harvest log in one system.
Browse the shop →More Vegetable Garden & Orchard guides

- Sources:
- Utah State University Extension — Potato: Planting and Spacing
- Utah State University Extension — Potato Seed Handling and Treatment
- University of Nebraska–Lincoln Extension — Planting Seed Potatoes
- Oregon State University Extension Service — Best Practices for Harvesting and Storing Homegrown Potatoes
- University of Connecticut Extension IPM — Common Scab