Testing Clay for a Cob Oven: A Beginner's Guide to the Jar, Ribbon and Test-Brick Checks
You do not have to buy clay to build a cob oven. Most yards have usable subsoil under the topsoil. What you need to know is how much sand, silt and clay it holds, because that decides how much sand to add. Three cheap tests answer it in about a day.
Planning the whole build? Start with our overview, Building a Wood-Fired Cob Oven. Once the dome is done, see how to cure it without cracking it.
Why test the clay at all
Cob is clay for stickiness and strength, sand for bulk and resistance to shrinking, and straw for tensile strength. Too much clay and the dome shrinks and cracks as it dries. Too little and it crumbles. Subsoil varies a lot from one yard to the next, so a recipe copied from someone else's soil is a guess. Testing yours turns it into a measurement.
Test 1: The jar test (sand, silt and clay)
- Dig a cupful of subsoil from below the topsoil. Break up and dry any hard clumps first.
- Put it in a clear quart mason jar and add water until it is about an inch from the top. Shake it hard.
- Leave it alone for about 24 hours.
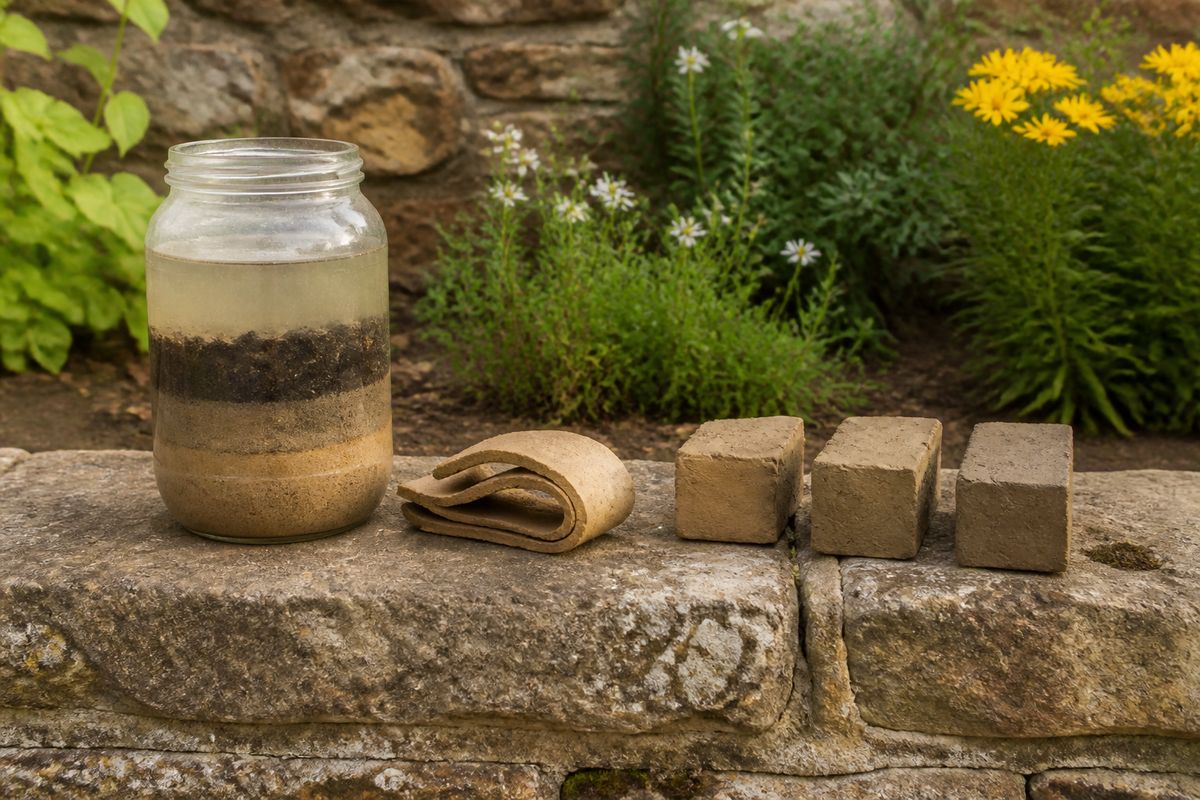
- Read the layers from the bottom: sand settles in minutes, silt over about 30 minutes, and clay over the following day. Organic matter floats on top.
One cob-building reference gives a workable blend as roughly 2 parts sand to 1 part silt and clay. If your jar is far from that, you will need to bring in sand (or clay) from elsewhere.
Test 2: The ribbon test (how much clay)
Mix a handful of the soil with just enough water to make a stiff mud, then roll it into a snake about as thick as a pencil and try to bend it without breaking. The more it bends and holds together, the higher the clay content. A snake that breaks the moment you bend it is sandy; one that bends into a ring is very clay-rich and will need a lot of sand and straw.
Test 3: Test bricks (the one that settles it)
The jar and ribbon tests tell you what is in the soil. Test bricks tell you how the finished mix behaves. Make small bricks (a few inches across and about an inch thick) from three or four mixes of clay, sand and chopped straw, write the recipe on each, and let them dry for a week or more in the shade. Then compare them. The best mix has the fewest cracks, does not crumble when you scrape it with a thumbnail, and is hard when you tap it. Use that recipe for the dome.
Clay recipes and a step-by-step build
The Homestead Cob Oven Build Guide is a 45-page illustrated PDF with a clay-testing chapter, starting recipes for the thermal and insulating layers, 35 numbered steps with 3D pictures, parts and cut lists, curing, firing and recipes.
Browse the shop →