How to Start an Herb Garden: A Beginner's Guide to Growing, Harvesting, and Drying Herbs
Most new herb gardens fail for the opposite reason people expect: not too little care, but too much. Rich soil, heavy fertilizer, and frequent shallow watering — the instincts that work for vegetables — actively work against herbs.
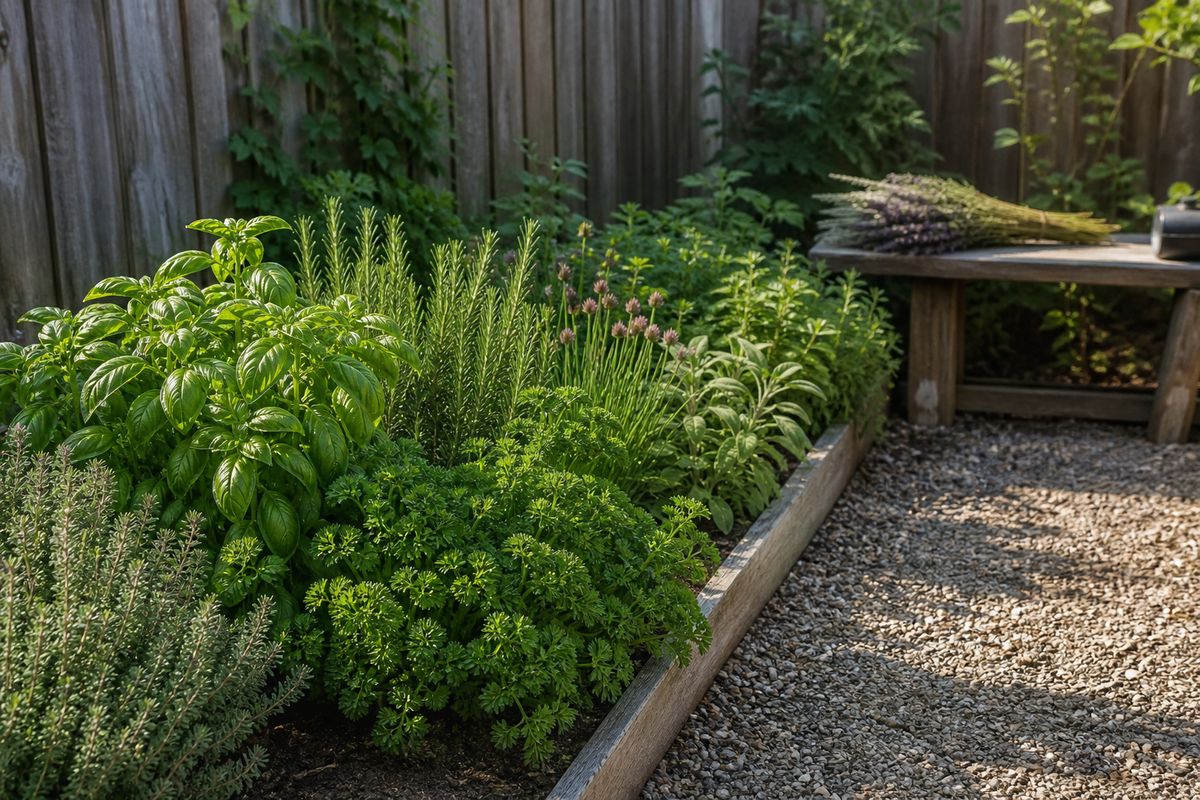
Herbs are some of the most forgiving plants in a home garden once you get past one counterintuitive fact: they perform best in leaner, less-fertile conditions than most other edibles. A tomato bed amended with compost and fed all season is doing what it should. An herb bed given the same treatment often grows lush and leafy at the cost of the essential oils that give herbs their flavor and scent in the first place. Here's what university extension research actually recommends, from siting the bed through drying the harvest.
Site, sun, and soil
Almost all herbs need a sunny location, though a handful — chives, chamomile, and bay among them — tolerate partial shade. Soil matters more than sun for most beginners' problems:
- Drainage first: herbs need loose, well-drained soil; heavy clay or soggy spots slow growth and can kill plants outright. Working in compost improves drainage in clay soil.
- pH: aim for roughly 6.0–7.5, with many extension sources pointing to a slightly acid ~6.5 as a solid target.
- Fertility — counterintuitively, less is more: avoid rich, overly fertile soil. High fertility (especially excess nitrogen) pushes leafy vegetative growth at the expense of the essential oils responsible for flavor and aroma. If you fertilize at all, use a light application — a liquid feed like fish emulsion is the extension-recommended approach, not a heavy granular feed.
Containers vs. in-ground
Both work; the right choice depends on how much control you want over soil and how portable you need the planting to be:
- Containers: must have drainage holes. They offer full control over soil quality, can be moved to chase sun or come indoors for winter, and let you size the pot to the plant's actual mature size rather than guessing at bed spacing.
- In-ground: a soil test is worth doing before planting (many state extension offices offer this inexpensively or free to residents) so you know your starting pH and fertility rather than guessing.
Whichever you choose, space plants according to their mature size, not their size at planting — mature herb spread ranges from about a foot across (thyme) up to 6 feet (angelica, or bay grown in-ground). Crowding causes weak growth, poor air circulation, and a higher risk of disease, the same problem it causes in a vegetable bed.
The easiest herbs to start with
If you're choosing what to plant first, tender herbs like thyme, basil, rosemary, and mint are among the easiest to propagate from stem cuttings, which makes them forgiving, low-cost starter choices. It's also worth knowing which herbs are perennial (come back on their own) versus annual (replanted each year) before you plan a layout:
- Perennial: chives, thyme, and hardy mints (again — contain the mint).
- Annual/seasonal: basil, cilantro, dill, and parsley, typically grown fresh each season.
Timing matters for transplanting or direct-seeding outdoors: cool-season herbs tolerate soil around 50°F, while warm-season herbs like basil want soil closer to 60°F before they're put out — planting warm-season herbs too early into cold soil is a common beginner setback that looks like a plant-health problem but is really just timing.
Watering and feeding without killing the flavor
Extension guidance is specific enough here to give a beginner an actual routine rather than a vague "water when dry":
- Outdoor, in-ground herbs: water deeply about once a week, soaking the soil to roughly 8 inches, rather than watering shallowly and often. Shallow, frequent watering produces weak, shallow root systems.
- Container herbs outdoors: may need daily watering in hot weather, since pots dry out much faster than garden soil.
- Indoor herbs: water when the soil is dry about ½ inch below the surface.
- Fertilizing garden beds: lightly, with something like a 5-10-5 fertilizer once per season at about 3 oz per 10 feet of row.
- Fertilizing containers: a half-strength liquid fertilizer roughly every 6 weeks indoors, or every 3–4 weeks outdoors.
Mulching helps outdoor beds retain moisture between deep waterings and suppresses weeds at the same time.
Harvesting without stunting the plant
You can start picking as soon as a plant has enough foliage to sustain its own growth, but how you harvest matters as much as when:
- Take no more than about three-quarters of the current season's growth in any one harvest.
- Harvest before flowering — once a plant flowers, leaf production declines, so pinching off flower buds as they form extends the useful harvest window.
- Time of day matters: pick after morning dew has dried but before the heat of intense sun, which is when essential oil content is highest.
- Pinch at leaf nodes rather than stripping individual leaves — this encourages the plant to branch out and produce more growth, rather than just getting smaller.
Drying and freezing your harvest
A single flush of herbs is often more than a household can use fresh, and both drying and freezing are extension-endorsed ways to hold onto it. For drying, sun-drying is specifically discouraged — it degrades both flavor and color — in favor of these methods:
| Method | Time | Temperature |
|---|---|---|
| Air drying indoors | Several days | Warm, well-ventilated room |
| Dehydrator | 1–4 hours | 95–115°F (up to 125°F in humid areas) |
| Oven | Overnight | Very low — pilot light or oven light only |
| Microwave | 2–3 minutes | High power (1,000W or lower) |
However you dry them, the test for doneness is the same: leaves should crumble and stems should snap cleanly when bent. Store finished herbs in labeled, airtight containers in a cool, dark, dry spot, where they'll hold good flavor for up to about 6 months.
Freezing is the better option for herbs that lose too much character when dried, like basil and other tender-leaf herbs. Pat herbs dry first, then either wrap small sprig bundles in freezer wrap and seal them in a labeled bag, or spread leaves in a single layer on a tray to freeze individually before transferring to a labeled bag. Keep the freezer at 0°F or below. Note that freezing changes texture — parsley in particular goes limp on thawing — so frozen herbs are best used in cooked dishes rather than as a fresh garnish.
From a few pots on the porch to a real kitchen herb garden
Once you've got a bed or a row of pots going, The Homestead Herb Garden ebook walks through growing, drying, and using 47 pages worth of herbs, with a herb-pairing-by-cuisine chapter and 14 recipes. And once you're cooking with what you grow, the Herb & Spice Substitution Chart is a printable kitchen-wall reference for fresh-to-dried ratios and in-a-pinch swaps.
Browse the shop →