Canning Meat, Poultry & Broth Safely at Home: A Beginner's Guide
A homestead that raises its own broilers, rabbits, or a hog for the freezer eventually runs into the same question: how do you put meat up in jars instead of relying on freezer space alone? The answer is narrower than canning vegetables or fruit — meat only has one safe method, no shortcuts — but it's very doable once you know the exact numbers.
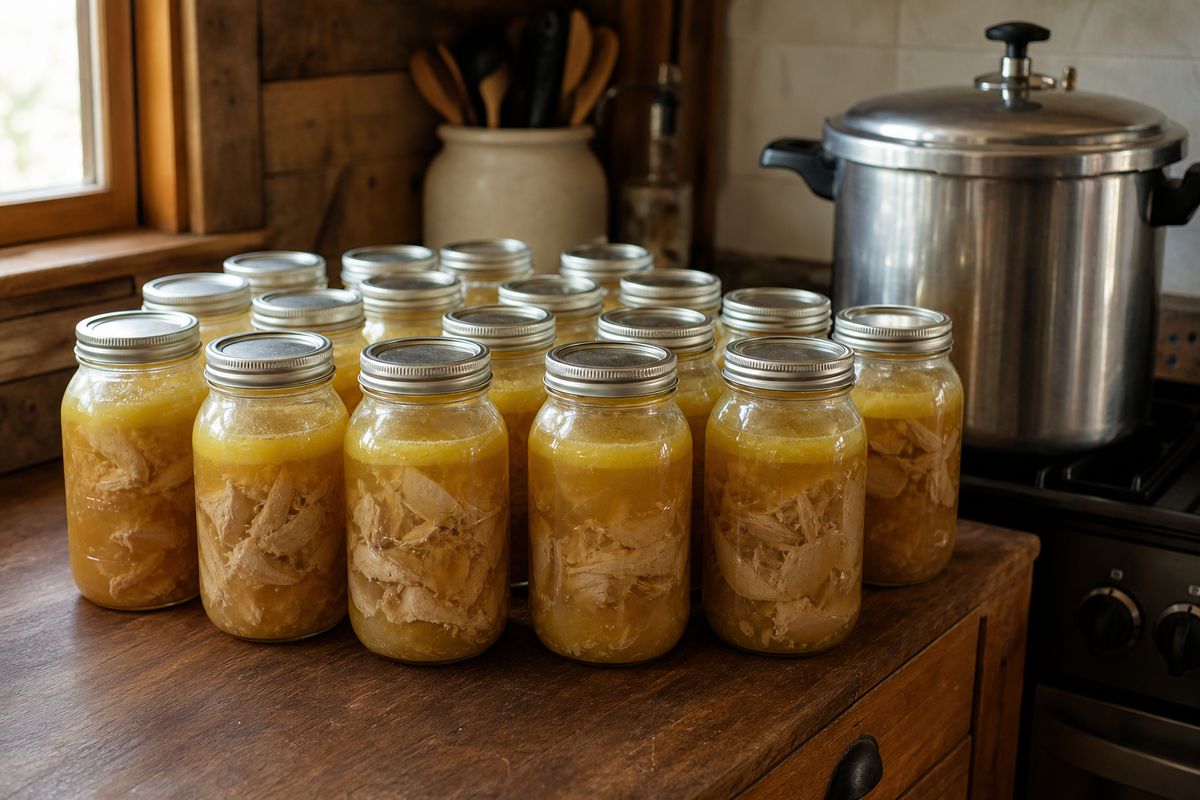
If you haven't canned anything before, start with our general home canning basics guide for jar prep, altitude adjustments, and the acidity logic behind the two canning methods. This article picks up from there and goes deep on the one method meat actually uses.
Why meat only has one safe method
Meat, poultry, and broth are all low-acid foods, and Clostridium botulinum spores survive a 212°F boiling-water bath. There is no tested boiling-water (water-bath) recipe for any of them — a pressure canner reaching 240–250°F is the only method that reliably destroys those spores, and that's true regardless of how the meat was raised, how fresh it is, or how acidic the surrounding liquid tastes.
Hot pack vs. raw pack
Both packing methods exist in tested guidance, but hot pack is the one extension sources actually recommend for most home canners — it gives a better-filled jar and better quality in storage, because raw meat's own juices usually aren't enough to fully cover it once packed.
| Meat type | Hot pack | Raw pack |
|---|---|---|
| Chicken, rabbit, or similar poultry/game | Partially cook (boil, steam, or bake) until about two-thirds done, then pack with hot broth | Pack raw pieces loosely into the jar; add no liquid |
| Strips, cubes, or chunks | Precook until rare, then cover with boiling broth, drippings, water, or tomato juice | Pack raw; add no liquid |
| Ground or chopped meat | Cook until lightly browned, then cover with boiling broth or water (hot pack only — no raw-pack version exists) | — |
Ground meat specifically is worth a second thought: it can be canned safely, but extension sources note freezing gives noticeably better quality — canning is really there for when freezer space runs out, not as the first-choice method for ground meat.
Headspace and optional salt
| Food | Headspace | Salt (optional, flavor only) |
|---|---|---|
| Poultry, rabbit, or similar game, with or without bones | 1¼ inch | 1 tsp per quart (½ tsp per pint) |
| Strips, cubes, chunks, ground or chopped meat | 1 inch | 1 tsp per quart (½ tsp per pint) |
| Meat stock / broth | 1 inch | no guidance given — add to taste after opening instead |
Salt is purely for flavor in all of these — it plays no role in safety, so skipping it entirely is fine if that's your preference or a dietary need.
Getting the meat ready before it ever sees a jar
- Keep meat chilled at 40°F or below until you're ready to can it, and plan to can within a day or two of slaughter/processing — if that's not realistic, freeze at 0°F or below and thaw in the refrigerator before canning rather than letting it sit.
- Chill dressed poultry 6–12 hours before canning.
- Trim excess fat, gristle, and bruised spots. Fat that migrates up to the jar rim during processing can prevent a proper seal and can also turn strong-flavored in storage.
- Soak strongly flavored meat — wild game, rabbit, strong-tasting poultry — for 1 hour in a brine of 1 tablespoon salt per quart of water, then rinse before packing. (Skip the salt in the jar afterward if you brined this way, so you're not salting twice.)
- Large bones come out, but smaller bones (poultry, rabbit) can stay in — meat with bones actually needs a shorter processing time than boneless, since bone is more porous and heat moves through it faster.
Making and canning broth or stock
Homestead broth is usually the by-product of processing poultry or an animal for meat, which makes it a natural second product to can alongside the meat itself:
- Simmer bones and bony trim in water until the meat falls away easily — roughly 3–4 hours for beef bones, 30–45 minutes for a chicken or turkey carcass.
- Strain, cool quickly, and skim off the fat that rises to the top.
- Reheat the strained broth to a full boil, then fill jars, leaving 1 inch of headspace.
- Process in the pressure canner at the time/pressure for stock (below) — never water-bath, even though broth looks and pours like a clear liquid.
Processing times and pressure
Processing time depends on the food and jar size; pressure depends on your altitude and which type of gauge your canner uses. Always use the full time below regardless of jar size you choose — a smaller jar is safe, but it doesn't get a shorter processing time.
| Food | Pints | Quarts |
|---|---|---|
| Poultry, rabbit, or similar game — with bones | 65 min | 75 min |
| Poultry, rabbit, or similar game — without bones | 75 min | 90 min |
| Strips, cubes, chunks, ground or chopped meat | 75 min | 90 min |
| Meat stock / broth (beef, chicken, or turkey) | 20 min | 25 min |
| Altitude | Weighted-gauge canner | Dial-gauge canner |
|---|---|---|
| 0–1,000 ft | 10 lb | 11 lb |
| 1,001–2,000 ft | 15 lb | 11 lb |
| 2,001–4,000 ft | 15 lb | 12 lb |
| 4,001–6,000 ft | 15 lb | 13 lb |
| 6,001–8,000 ft | 15 lb | 14 lb |
Before closing the canner, vent steam for 10 minutes — don't close the petcock or add the weight until then. Start timing once the gauge reaches the target pressure (dial) or once the weight begins to jiggle steadily (weighted). When processing ends, let the canner cool and depressurize completely on its own, then wait another 10 minutes before opening the lid — never force-cool it or vent it early.
A few things worth knowing before your first batch
- Use cayenne, not sage, in home-canned sausage. Sage reliably turns bitter after pressure processing — a flavor problem, not a safety one, but worth avoiding on a first try.
- Venison benefits from added fat. Extension guidance suggests grinding in about one part pork fat to every three or four parts venison, since deer meat is lean enough to can dry and bland otherwise.
- Have your dial gauge checked yearly. Many Cooperative Extension offices will test a dial-gauge canner's accuracy for free or at low cost — a gauge reading even a couple of pounds off changes whether your jars actually reached a safe temperature.
- Sealed jars store well, but not forever. Properly sealed, home-canned meat keeps its quality for up to about two years in a cool, dark spot — label jars with the date so older ones get used first.
- When in doubt, don't taste it. A lid that isn't concave, any bulging, spurting liquid on opening, or an off smell all mean the jar goes in the trash, unopened and untasted.
Keep every batch, cut, and date straight
For every tested recipe and the full processing-time tables in one printed reference, The Homestead Canning Book covers meat and stock alongside produce, jams, and pickles in 56 pages. If broilers are the meat you're putting up most, the Pastured Broiler SOP & Record Book Bundle tracks the batch from brooder to freezer (or jar). Pulling meat out of the canner is also exactly when a safe-temperature check matters if you're reheating or finishing it in a dish, and the Canning Inventory & Pantry Log keeps every jar's contents and canning date straight on the shelf.
Browse the shop →